I’ve researched, scripted, recorded, and edited well over 7,000+ pieces of video content. I've made everything from my own social media content, hiring videos, and helped in the early days of building the video team at VEED. Our YouTube channel at VEED drives 40,000 to 50,000 organic visits which result in over 200+ monthly paid signups.
Before I teach you what I know I want to be straight-up with you on what this blog is not:
- A dishonest over-simplification of something that’s tough to master
- A huge list of equipment and software you should buy
- A collection of advice I never practice
Dominating video means mastering a diverse set of skills. This mastery is a product of time, practice, and perseverance. Unfortunately—telling people how things will be difficult is not what gets engagement because added friction equals more drop-offs.
If you don’t create a strong foundation that welcomes failure, initially looking and sounding awkward, and a consistent video creation practice then a $150 to $5,000 investment on a video setup alone will never improve your video results.
Even when you get pretty good at video you might still feel butterflies in your stomach with the occasional imposter syndrome flare-up. I say this not to be a pessimist but because most people new to video hold themselves to unrealistically high standards set by people who don’t know what they’re writing about and people who care more about you clicking on their affiliate links than being candid with you about what really matters at the core of every great video.
Practice makes progress.
And if you’re still here and believe in putting in the work to master video I have a collection of video content tips I live by for you steal from me and improve upon.
1. Outline your ideas and their execution before recording
Ever make a video and then realize it would’ve been soooo much better if you had thought of doing (insert thing you wish you’d done) before?
It doesn’t matter if you record video content on a shitty webcam or a $2,000 camera. Knowing what to talk about isn't even the biggest concern if this isn't addressed.
Structure and delivery are the most important things to obsess over.
It's not just about what you'll say but:
👉 When will you say it?
👉 How long will you take to say it?
👉 How will editing support the retention of your message?
This is why research and learning how to write better are, in my opinion, the two most important skills every content creator should focus on regardless of which content format they gravitate towards.
Before I make a video there's always some degree of light to heavy planning (depending on the content format’s complexity and estimated video duration).
For videos under 60 seconds, I like making bullet points on a sticky note to remind me of the order I want to touch on things. Although these shorter videos still require some research, I find if I over plan a short video I overthink things that aren't thaaat important.
Generally, I like to keep shorter videos down to a simpler process and use them for testing topics with the potential for a deep dive.
For videos longer than one minute, here's what I do to create an outline.
STEP 1 Research: What works, why, and what's my angle?
When I dig into a topic I'm interested in, I find answers to these questions:
- Is there proven demand for this topic?
- Can I bring my own original angle to it?
- What are people already searching and asking about this online?
- On average, how long are the videos already published on this topic?
- What's working and not working for others? Am I spotting any patterns?
- What did competitors miss that might give me a different angle to make this better?
- Besides the meat of the video–what do good thumbnails look like? Captions and descriptions?
This helps you create a research document with insights that will help you tackle the right topics as effectively as you can. And if you’re updating an older video I would add in one more question—what’s working for others that my existing video on this topic is missing or not doing well?
Before I make a video there's always some degree of light to heavy planning. Here’s what this process looks like depending on the video’s duration.
TikToks (or low production value videos under 60 seconds)
The extensive planning you do for a YouTube video might be overkill for a TikTok. By the time you wrap up your outline a trend may have already died down and become irrelevant making speed + lower-production value videos key to your success on this platform.
You can apply the steps in the these sections to short-form videos. But remember it’s okay to experiment and change things up based on what you learn works for you
There are three main pillars of strong short-form content to take into consideration whether you choose to lightly or heavily research and plan your post:
Relevance
- Is your profile as a whole covering categories with proven interest on your platform of choice?
- Are you covering topics you’re qualified to speak on and are aligned with your brand?
- Which trending topics, audio, or filters are aligned with your brand?
Scroll-Stopping in Under 3 Seconds
- What can you say, show, or edit in your video to get people to stop scrolling?
Story/Lesson/Cute/Surprise + Loop Factor
- What can you teach, share a story on, and/or show that’s cute or surprising?
How long should your video be to get more view completions?
- Can you script your video so it loops and improves view completions?
🧠 What is “strong” short-form content by my definiton?
Content that strikes a balance between driving engagement + audience building on your social platform of choice while also helping build brand and drive attention to your website is strong short-form content. Virality alone is not an indicator of social content success if curiosity wasn’t piqued enough to drive more people to whatever next step helps get people deeper closer to your product/service.
Usually, I keep shorter videos down to a simpler process. Although these shorter videos still require some research, I find if I over-plan a short video I overthink things that aren't thaaat important.
Rule of Thumb?
What didn’t work for me might work for you. Experiment with how heavily you plan. Start small and build from there to see how much you can get away with in terms of low production value.
But what if you're making a YouTube video? More on this next…
How VEED’s YouTube Channel Grew with Video SEO + Good Content
In the early days of VEED’s YouTube channel we were scrappy. Alec, our first video creator and now video team lead, had to start from scratch with building our channel. Therefore, with no past data to work with, he didn’t yet have the specific insights for what would specifically work for VEED.
We also didn’t have the team of creators we now have that allows us to scale our content production efforts with greater ease.
Here’s the the part most people stay stuck on:
When you have no data of your own to start with you need to shoot your best shot content-wise before you can make bolder and more precise content decisions later so you can get buy-in to scale your efforts. But people will become overly-fixated on perfection and romanticize content to the point they mislabel their procrastination as perfectionism.
There is no room for perfectionism in the early-stages of your content. Your content needs to go through the awkward stages of “puberty” before it has a glow up.
After a few months of posting 5 days a week, we noticed 54% of organic traffic coming to our site from YouTube came from just 17 videos.
And from those 17 videos here are some obvious (or maybe not-so-obvious things) we noticed:
- Video Result Keywords: Videos ranking for a featured video result or video carousel brought in the most traffic.
- Business Value: The more your product/service is an irreplaceable solution to help solve the viewer’s problem the better the quality of the traffic.
- SEO-Friendly Scripts: When you incorporate related terms people search for you capture more search volume and have a better shot at ranking.
- SRT Files: Scripting topics with SEO taken into consideration and then uploading the SRT subtitle file helps content perform better (all our top content had an SRT file and lower performers mostly did not)
- Zero Fancy Intros: Not wasting time with a longwinded intro retains more viewers.
From there we made sure to prioritize covering high-business value topics with a video-result keyword and ensuring each video took SEO into consideration with the viewer experience placed on a pedestal. Our channel became more intentional covering topics and their subtopics that we finally knew worked for us.
The VEED channel now drives 40,000 to 50,000 organic visits resulting in 200+ monthly paid signups.
Quick Note: Don’t forget to add a tracking link to pages linked your video descriptions.
How you can apply our video content + SEO lessons to your own videos
⚡️ Target video-result keywords when possible to rank on booth Google + YouTube
Using a tool like Ahrefs (or simply searching terms on Google) you can find which topics might contain a video-result keyword you can target.
⚡️ Go after topics with a high business value
It’s easy to get stuck in the virality trap of trendy topics that simply get you more engagement but don’t translate into getting results that will help you grow your business (and your video team if you want to scale). Reverse engineer what else people might be searching for before choosing to spend their money. You can then map out what question you need to answer for different hubs of videos and even group them into playlists for a better content experience.
You can use Ahref’s scale for business value which looks like this (quoted from their site):
- “3”— our product is an irreplaceable solution for the problem;
- “2” — our product helps quite a bit, but it’s not essential to solving the problem;
- “1” — our product helps marginally;
- “0” — our product doesn’t help solve or relate to the problem at all.
⚡️ Nail search intent
Always look at content that’s already ranking and watch a few videos to make sure you’re not making assumptions about what the search intent is. By watching other videos doing well you can begin to pinpoint patterns in terms of:
- what are some things these videos all seem to cover that you should cover?
- And what are they not covering well or not at all that you have an opportunity to do better on?
⚡️ Incorporate related terms in your script in a way that sounds natural
It’s not about saying the same term 5,000 different ways. Think of it more like finding chapters and ideas that should be included in your video. For example, a video covering best live streaming equipment might find related terms like best cameras for streaming or best mics for streaming. You could use these terms as a way to split your video into chapters.
And inside a chapter like best mics for streaming you could mention other terms like popular brands (e.g. Shure SM7B) or create a subcategory based on a term like best mics under $100.
The simplest way to go about this, in my opinion, is:
- Write the first iteration of your script with just the keyword-rich chapters mapped out so you have a good “skeleton” to build off of. Don’t worry about adding terms beyond the chapters at this stage.
- Review and make sure you like the direction you’ve mapped out.
- Dive back in and plug in other terms
⚡️ Write a strong title and description with keyword-rich timestamped chapters
Before people watch your video your thumbnail, title, and description help invite them to click through.
⚡️ Create and upload an SRT file
Use a tool like VEED to automatically generate subtitles and then download the SRT subtitle file to then upload on YouTube. You can also translate your subtitle file with VEED if you want to have other languages available for your video.
STEP 2 Outline ideas: how can I organize what needs to be said to retain viewership?
Not all videos are outlined the same. Shorter videos tend to follow a looser structure. I prefer making bullet points on a sticky note for these noting what I want to touch on rather than script word for word.
Longer videos are more complex so I'll make a g-doc with talking points, needed footage, and planning for edits. A google doc template keeps my longer videos structured. More later on how to keep your speech natural even if you’re reading a script.
To make a template of your own you can create a table with two columns:
- The things you’ll say and do
- Editing notes for your talking points (b-roll, suggested edits, sound effects)
This brings me to...
STEP 3) Map Out Audio, Effects, and B-Roll: How will my edits support the delivery, retention, and engagement of my message?
Editing will make or break the delivery, retention, and engagement of your video. It's easier to record a winning video when you've thought about how you'll approach the way editing will support your video’s ideas.
(2/2) Literally EVERY SECOND counts with video content.
— Diana Briceño (@dianagetssocial) September 23, 2021
Here's how to start making the most of it.
1. Pitch your topic to reel in viewers
2. State the solutions to retain them
3. Immediately dive into the value
4. Make a simple ask for your CTA pic.twitter.com/Hv1th1H5rX
Keep in mind, not every video needs to go "all-out" in terms of the edits.
- An Instagram story might benefit from some simple zooming in/out with your camera as you state key points you want to emphasize and the placement of poll or question stickers
- A YouTube video will tend to be more complex with edits such as sound effects, animations, voiceovers, video-on-video overlays, etc
- Hours of video course content can be broken down into 3 to 5 minute-long YouTube-esque segments with simple overlays of referenced material.
Look at your outline and think about what would enhance your video? Think of it in terms of how can audio, text, effects, or b-roll footage support your visual and auditory storytelling? Just like in writing you edit out the fluff, think of what you could add or subtract from a video to make it as short or as long as it needs to be effective.
If it doesn't make the video easier to watch and better then don't do it.
STEP 4: Record
In this step we’re going to talk about equipment, software, and your home (or office) setup. The linked products are affiliate links to things I actually use (or have used). The minimal income I may make from these links is fully reinvested back into my content to improve your experience.
What kind of equipment should you buy?
I'm a firm believer that the majority of people planning to incorporate video misplace their focus on gear. You can buy the most high-end stuff but if you lack the principles of a strong foundation the $2,000+ camera can't help you.
I've always kind of hated the obsession with buying these things (unless you're a video production or media company) so I won't dig too much into this.
In fact, in the first year or so of running the YouTube channel at VEED our #1 video for about 2 years was shot with a basic webcam. That's evidence sometimes people often overcomplicate and overproduce content when they just need to get on with making their first few videos.
But if you do care for these things and have the money for helpful basics then you can't go wrong with getting yourself:
- A camera (or any smartphone with a good camera)
- Single-point lighting setup (can be light from a window or a ring light)
- A sturdy tripod (I highly suggest not going cheap on these as I always found myself replacing cheap $15 tripods)
- A clip-on microphone
- A video editing tool you’re comfortable with
You just reaaaally don't need to go all-out spending-wise on these to get started.
Good content principles, your phone's camera, a generic brand clip-on mic, and natural lighting will take you further than a big upfront investment in gear. Obsess over the things that can be built not bought and you will future-proof yourself with valuable skills that'll serve you in the long run.
With that said…
If you’re wondering what it can cost to have a quality setup I’ll share the gear I use and therefore can speak about their quality.
🎥 Camera Setup
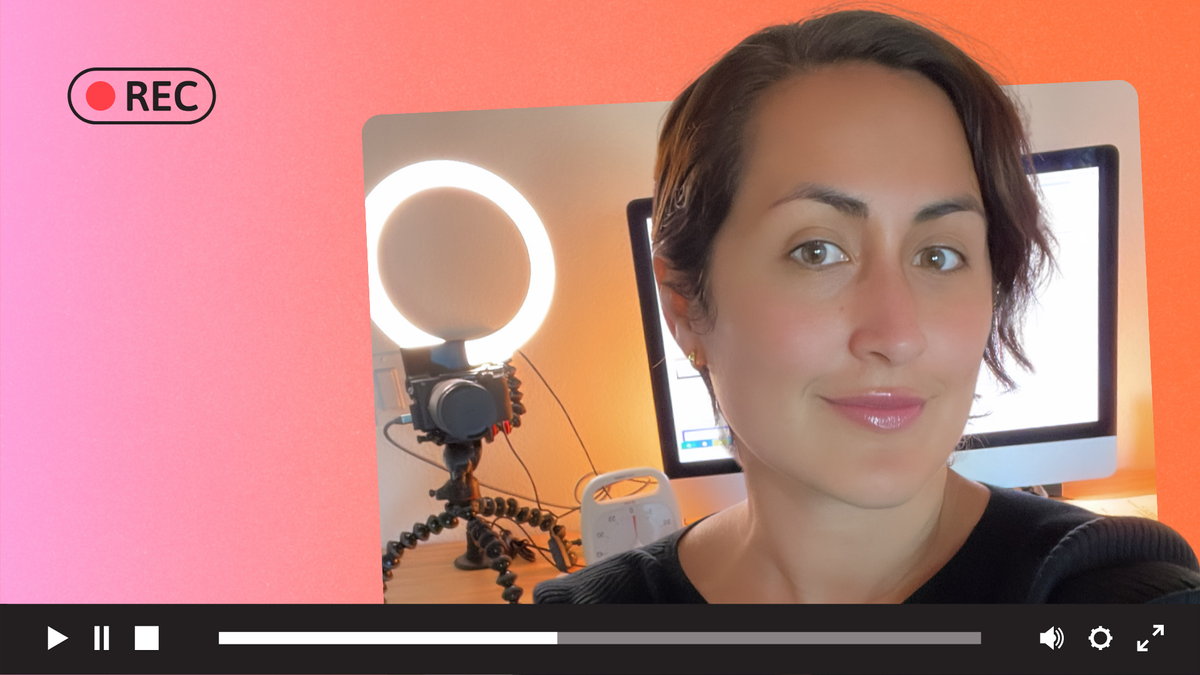
I record content at my desk in my home office using my camera as a webcam. These are the tools I use to record and then ensure my battery never dies while recording.
- Sony Alpha a6400—$998
- Sigma 30mm F1.4—$238
- CamLink 4K—$99.99
- 4K Micro HDMI to HDMI 6-Foot Cable—$9.99
- Kimaru Power Supply Dummy Battery—$25.99
🎙 Audio
I used to have a Blue Yeti and it was absolute crap. I was between the Wave DX Mic and Shure SM7B. I decided on the Wave DX Mic because the Shure SM7B is $399 and it was just to pricey for me at the time. The day my Wave DX fails I might splurge on the Shure mic if it makes sense for me then. Right now I’m really liking the DX mic though. It’s a fair price and does a great job. The mixer/preamp helps make controlling the audio (and muting myself) faster and easier for me.
- Wave DX Mic—$99.99
- Wave XLR Audio Mixer and Preamp—$129.99
- Standard XLR Male to Female Balanced Microphone Cable—$12.49
💡 Lighting
The Elgato Ring Light comes with a mount to prop up and adjust the angle of your light. It also comes with attachments to mount your camera or phone. This was not clear to me at all (and still isn’t) from their landing page. I thought I had to buy the mount separetly. You might be able to get away with just this light + mount. I found a use for my extra mounts though which I’ll discuss next.
- Elgato Ring Light—$149.99
- 10” Ring Light—$32
🪜 Mounts and Tripods
The Wave Mic Arm holds my mic and I can adjust the arm’s positioning to my liking. I can easily fold it back to keep my desk clean and as minimalistic as possible when I’m not recording. I use the Master Mount L with the Flex Arm L to mount and adjust my 10” ring light. The solid arm serves as a mount for my phone clip (comes with Elgato Ring Light) if I choose to use a second camera angle.
- Wave Mic Arm—$99.99
- Master Mount L—$38.95
- Flex Arm L—$39.99
- Solid Arm—$29.99
⚡️ Video Software
I record with VEED’s webcam recorder. The footage is automatically loaded into the editor and saved onto my cloud workspace. This helps me work faster than if I shot on my phone, sent footage to my desktop, and then have to upload that footage myself somewhere to where I will edit and somewhere else where the raw file is stored. I use the business plan but for most creators the pro plan should be enough.
🎨 Thumbnail Design
I use two tools primarily—Keynote (or Powerpoint if you don’t have a Mac) and Canva. Canva alone is good I just personally prefer both tools. I have a graphic design background and know how to use Adobe’s creative suite. But sometimes so many options overcomplicate creative decisions. I find all I need is the ability to manipulate text easily (which Keynote does better than Canva), remove image backgrounds (Canva excels here), and pull visual assets (Canva’s library rocks at this).
- Apple Keynote—Free (iOS devices only)
- Canva—Freemium
STEP 5: Edit your video
Thanks to your planning and outline, you’ll find editing will be faster, clearer, and involve less time-consuming guesswork.
The tool you use to edit is not magic. People tend to focus on what the best tool is from a general consensus rather than:
- Understand what each tool can do
- Be honest with themselves about how much of a time investment they want to put into learning a potentially advanced professional-grade software
For example, if you want to…
Make great video and not invest too much time into learning a complex tool like Adobe Premiere and After Effects then VEED is best for you. With VEED you don't have to be an expert to make great video content.
Be a professional YouTuber with access to more advanced creative control over your edits, audio, animations, and color grading then Adobe Premiere and After Effects would be best for you.
Edit the occasional video for free while on the go then CapCut or Instagram and TikTok's built-in editing tools are best for you.
2. Use pattern interrupt for better viewer retention
Usually, we have about 2.7 seconds before people drop off and after the 10-second mark around 20% of viewers give up. We make ruthless split-second decisions every day when skipping a story or video post on your feed.
This is where good video structure + editing (thanks to pattern interrupt) comes in to improve your video watch time (and support your overall channel engagement).
I always stop watching videos when it takes forever to get to the point and/or it feels like one continuous unedited shot. Maybe what they’re saying isn't actually boring. Their delivery and editing are what make the content boring because it’s so monotonous.
To break boring monotony you need pattern interrupt. Pattern interrupt is any change in a video that helps refocus your audience's attention.
Pattern interrupt can be as simple as a subtle zoom in/zoom out to an animated text overlay with some fancy sound effect and filter. It’s anything that breaks the pattern of whatever is going on.
And psychologically speaking, it fools our brains into thinking we’re consuming new content.
Examples of Pattern Interrupt:
- Split a video clip and make the selected split segment zoom in and out
- Add sound effects to video to support making a point (e.g. victory sounds when sharing a win, laughter for something funny)
- Change the background music of your video to fit different segments and their mood rather than use one song the whole time
- Stop all background music, add a record scratch sound effect, and zoom in to yourself talking to emphasize a turning point in your story before resuming with new music
- Add animated text (e.g. intro new speakers in your video, present new step in a step-by-step video tutorial)
- Add filters and effects to video (e.g. you could add a black/white filter with to convey sadness, fire effect to express something that’s pissing you off, or a VHS/Glitch effect if you’re referencing something in the past)
These are just a few examples. Get as creative as you’d like exploring how pattern interrupt will look like in your editing process.
3. Before you create a high production-value video validate the idea with a low-production value post
I learned this type of thinking from Val Geisler in her book Everybody Writes where she compares content to a dinner party. I thought it was genius and applied the thinking to video production.
Let’s think of content as a meal.
🥂 Drinks (Low Production Value)
Simple value-filled posts that are quick and easy to make like handing a dinner guest a glass of wine.
Examples:
- A single-image feed post on Instagram
- A batch of Instagram stories
- LinkedIn status update
- Tweets
🥗 Appetizers (Medium Production Value)
Content that takes a bit more effort to produce like a small bite to eat. Follow up drinks with an appetizer.
Examples:
- Instagram carousels
- Instagram Reels
- Twitter threads
🥘 Main Course (High Production Value)
These are formats that take significantly more time and effort to plan, record, and edit. After drinks and appetizers comes the main course!
Examples:
- YouTube Videos or any videos that are about 3+ minutes long
- Blog content or downloadables
- Podcast content
- Slide decks
This is what will tell you what’s worth investing more time into. And this is also what will reveal additional questions people might have that your “main course” should include.
Note: You won't necessarily always start content from low to high production value. But it's a helpful framework if you don't know what's worth your focus or to test the waters of a big content idea you might want to produce.
4. Talk like you speak
People read too much into what to sound like on certain platforms and end up sounding like anything but themselves.
In my opinion—it's both easier and better, in the long run, to be consistent in your voice and adapt the topics to the platform. Just because other marketers say you should sound a certain way because you're on LinkedIn vs YouTube it doesn't mean they're right.
Should do this, should do that, so many should, should, shoulds...whatever.
Pretend you’re talking to a friend, a close co-worker, or even leaving yourself a voice note. Not only does this alleviate the tension of what you feel you “should” sound like but it makes your content easier to understand.
You'll waste years trying to sound like someone you're not whereas you'll invest months into learning to talk on camera like you normally talk when not on camera (and then just post it).
I highly suggest you start talking to yourself.
- Have imaginary conversations where you’re trying to teach or sell an idea to your customers, boss, or coworkers
- Talk before you type your script and see how it feels when you say it out loud
Practicing speaking out loud has helped me pick up on how I tend to vocalize my thoughts. When writing, newer writers tend to overuse the word "that" and in video you'll find you have some connector words or awkward sounds you might overuse like:
- Ummm
- Ahhh
- Some word or combination of words you find yourself repeating too much for whatever reason
Incorporate more natural pauses when you talk to people in real-time
Video makers I admire are not rushing from sentence to sentence. You can feel the natural pauses as they communicate ideas. And in a way, the calmness they convey from their more collected style of communication exudes confidence.
Frankly, I’m somewhat of an anxious person. I often feel like our world is moving at 1,000 miles per hour and it inevitably makes my brain and my speech attempt to catch up.
The practice of taking more natural pauses to be more intentional with every word helps me communicate better but also relieves some of my anxiousness.
This practice will pay off the most when you do live videos since you cannot edit yourself in real-time.
But if you’re not shooting live, the next point will show you what you can do by exaggerating these natural pauses to create the illusion of being naturally good at talking on video.
5. Pause in between sentences and ideas for easier editing
The previous tip to pause is not only good for clarity but also for easier edits!
Here's how to make it look like you can talk on video for a long time without getting tongue-tied.
- Pause for a few seconds before moving on to the next sentence or idea. You can glance at your script here so keep it somewhere you can easily glance at it without having to move around.
- Repeat steps 1-2 until your video is done.
- Load your video onto your video editor
- Look at the audio waves and cut out all the parts where there is a pause
- Now you have a smooth video that looks like you spoke for who knows how long without messing up.
This tip has made editing my content 500X easier!
Let's recap the lessons
- Outline your ideas and their execution before recording
- Use pattern interrupt for better viewer retention
- Before you create a high-production-value video validate the idea with a low-production value post
- Talk like you speak
- Pause in between sentences and ideas for easier editing
Remember, you can't master something without starting with what you have now so you can learn from mistakes as you go. I promise it'll feel more natural the more you do this daily (or weekly).

